
HOW DOES IT WORK
Assembly manual frame with textile fabric
You have received:
4 aluminium profiles
4 mounting corners with the word ‘face’ printed at the right hand corner
4 mounting corners with screws and the word ‘B Face’ printed at the edge of the corner
1 textile fabric with silicone beading around it
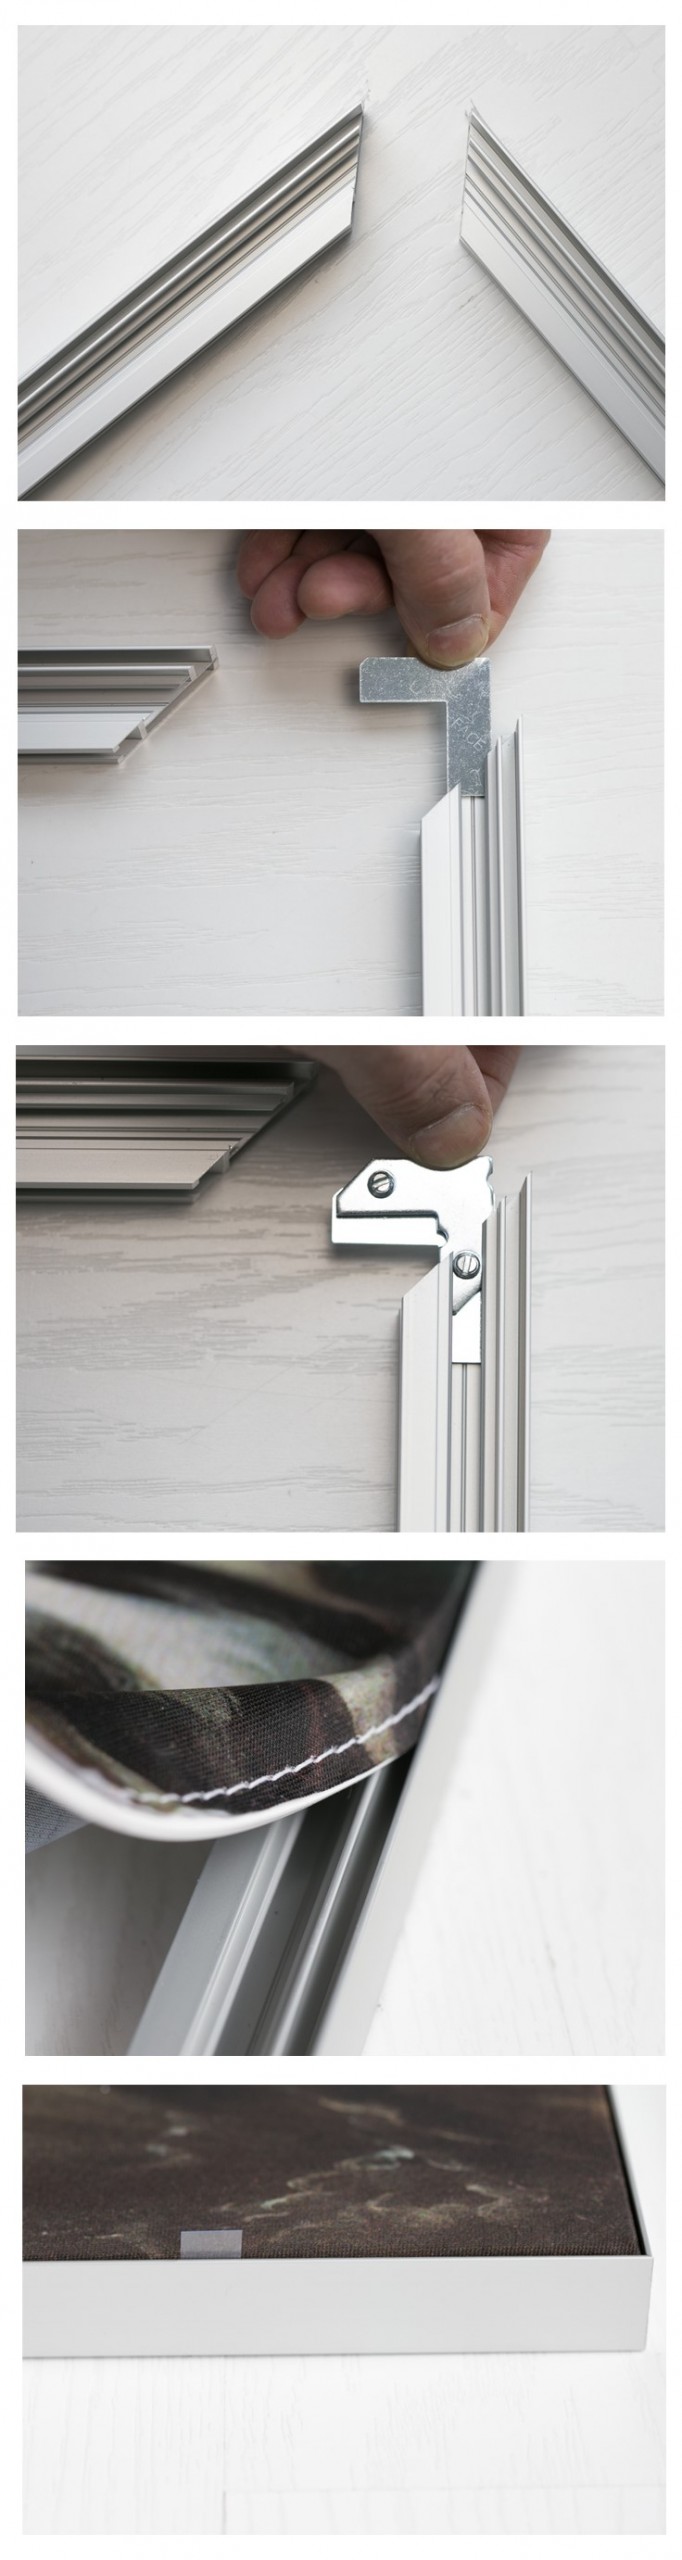
Step 1.
Place the frame parts with the slot facing up, on the floor
Step 2.
Slide the corner piece ( without the screws ) with the word ‘face’ facing up, in the corner of the first profile slot
Slide the corner piece with screws on top of the corner piece with the word ‘face’,on top. Please note : the word ‘B Face’ is faced down
Step 3.
Slide the second profile , with the slot facing up, towards the corner of the first frame part over the mounting corners. The two profiles are perpendicular to eachother.
Step 4.
Repeat step 3 for all the corners.
Step 5.
Remove the plastic protective foil around the sides of the profiles before you start mounting all the parts together
Step 6.
As soon as all the profile parts are in place, turn the screws with a screwdriver in the corner pieces. Make sure that the edges of the frame are connected well together, during the tightening of the corner pieces.
Step 7.
Place the textile fabric with the image facing up on the frame.
Fold the silicon beading perpendicular and push it into the left corner of the profile.
Then push the silicone beading properly in all the corners of the slot and next repeat it for all the sides.
Step 8.
Attach the wall mount brackets into the wall, adjust the screw if necessary and hang the frame over it.
Step 9.
Only applicable for frames larger than 2 metres and/ or if necessary.
Before you push the textile fabric into the slots, screw the profiles on to the wall, through using the pre-drilled holes. We advise using a bubble level.
Then install the textile fabric – see step 7